| ATLAS F1 Volume 6, Issue 39 | |||
 |
The F1 Rulebook | ||
| by Will Gray, England | |||
|
In a series of articles, Will Gray delves into Formula One's rulebook and investigates the in-depth documentation that governs F1: from rules defining how the event should be run, to those restricting designers and engineers in technical areas
Part Eleven: Safety First
Forget competition. The most important thing in motor racing is not the winning, and it's not taking part either - it is ensuring the driver gets out of the car safe and sound every time they are out on the track. Since 1994, when the Formula One world was shocked into revising their safety measures, the safety of the cars has improved dramatically. With large cockpit openings and the head surrounded by comforting and cushioning foam structures, they actually appear visually safer, too.
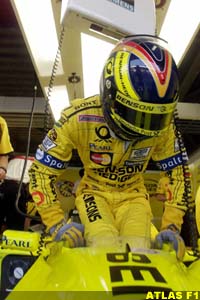
The rule requirement is that his exit is, in fact, no slower than five seconds, during which time the fully suited, booted, and helmeted driver must be able to remove his steering wheel (along with the cockpit padding if required) and extract himself from the car - 'without the use of a door', so state the rules!
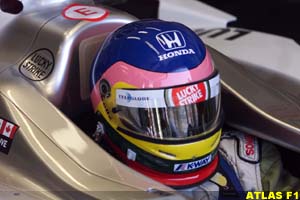
The steering wheel is removed using a quick release mechanism, which is operated by pulling on a disk situated at the rear of the steering wheel, and to further help the driver get out, the cockpit must be no smaller than an FIA defined template (giving a cockpit opening front to rear of 77.5cm). Once the driver has extracted himself from the vehicle, he must then be able to put the steering wheel back within ten seconds so that he can get out the way, and the marshals can steer the car if it is in a hazardous position. However, in the panic of the situation, drivers often struggle to get the wheel back on, and sometimes forget to replace it. If the do this, they will receive a very hefty fine!
Further to the head, another major body part the FIA are concerned for are the driver's legs - you only have to look at the injuries of Michael Schumacher (from Silverstone in 1999) and Olivier Panis (Canada 1997) to see why. There are strict template-fitting rules applied to the entire internal section of the chassis, which although it is not padded in any area, is designed to be wide enough to protect the driver (it must be no less than an area of 900 square cm), and also is supposed to be strong enough to resist puncture (although this wasn't the case in either of the two previously mentioned accidents).
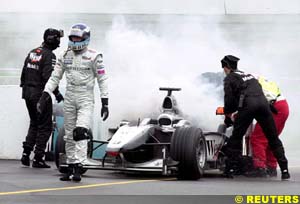
If a car is unfortunate enough to crash, the risk of fire is great. However, to limit this, all cars are fitted with a fire extinguishing system which discharges its contents into the cockpit and engine compartment in between 10 to 30 seconds. The system must operate even when the car is inverted, and should be triggered inside the cockpit by the driver or externally through a switch operated by a marshall at the scene of the incident - essential for when the impact is severe enough to knock the driver out.
To kill the car in the event of an accident, the complete shut down of its electrical systems is required. To do this there is an electrical master switch which it cuts the power to the heart of the car (the ignition and the fuel pumps) as well as to the rear light for a means of indication. It is operated once again by either the driver inside the cockpit (who must press a button signed by a red spark inside a blue triangle), or by a marshall pulling (with a hook from a distance if required) on a horizontal handle at the base of the roll over structure on the right hand side of the car.
The rules are strict, and many designs, particularly in the cockpit side areas, have tried to maximise performance and simply meet the criterion required - some designs have even failed to do this! However, all teams know that this topic is one of the FIA's biggest concerns, and although some drivers claim the thrill of the daredevil element is reducing as Formula One becomes ever safer, the FIA knows there is still plenty of risk involved!
Previous Parts in this Series: Part 1 | Part 2 | Part 3 | Part 4 | Part 5 | Part 6 | Part 7 | Part 8 | Part 9 | Part 10
|
| Will Gray | © 2000 Kaizar.Com, Incorporated. |
| Send comments to: gray@atlasf1.com | Terms & Conditions |